Photobucket

The blog has moved! Please visit wendybirddesigns.net for the latest news and updates!

Tuesday, March 29, 2011

New Release - Tall Box

I’ve got a new template out today and of course it’s 25% off for Fresh Baked Brownies!

wbd_tallbox_preview

Find it in the store HERE

This box it very easy and sized at about 5.75" tall, you can easily fit candy bars or other odd sized treats inside!

Here’s one I did:


And lots of CT goodness!

by Sarah:

by Shelly:

by Tanyia:

by Heather:

There are more, but I don’t want to overload you with pictures!  Make sure you check out my gallery for the rest!

Sunday, March 27, 2011

Scoring Lines Tutorial

Looking for previous tutorials?  Search “tutorial” on the left side.

Scoring your lines is a very important step in assembling your hybrid project.  Card stock and other heavy weight paper does not fold cleanly like copy weight or notebook paper.  Scoring your lines creates an indentation that breaks down the fibers of the paper to give it a guideline to fold.

Scoring your lines is the difference between this:

  13

And this:

14

There are a range of tools you can use to score your folds and today I’m going to take you through some of them - including what you already have at home!

I’m going to start with my favorite - the Martha Stewart Scoring Board.  It retails for 19.99 but if you buy it at a chain craft store like Michaels or JoAnn, make sure you use a 40% or 50% off coupon!

2

It comes with a small bone folder and an envelope guide that slides into a compartment underneath.  There is also a storage compartment at the top for the bone folder.

5

I added the red line using a Super Fine Point Sharpie.  This is a huge help when you’re scoring lines that aren’t perpendicular or parallel to a straight edge.

There are comparable scoring boards on the market, like the Scor-Pal and the Scor-it-All, but the Martha Stewart is the lowest priced and is also the only one with grooves every 1/8 inch.  You also won’t find the others at most chain stores.

3

The bone folder that comes with this scoring board does the job, but it’s pretty thin and the edges are a bit sharp.  It’s not very comfortable in my hand and if you use too much pressure it can break through the paper.  This is a risk with most scoring tools though, so I recommend practicing on scrap paper no matter what method you’re using.

Because I wasn’t completely satisfied with it, I upgraded to the Martha Stewart Bone Folder. (Use a coupon!)

7

It is a much heavier weight and rounded so it is much more comfortable to use.  Because it is wider, it also doesn’t fit all the way down in the groove like the thin one so it won’t break through the paper.

9

The bone folder is also a great tool for creasing your folds.  This helps give them that sharp crease.

10

If you don’t have a scoring board, you can also use the bone folder on it’s own.  If you have a steady hand, you can freehand it or else use it with a ruler.

8

You’ll have best results if you have something underneath your paper that has a bit of give to it, such as a self healing mat, a mouse pad or magazine. 

If you have a paper trimmer (I have this Cricut one), you can use a scoring blade instead of a cutting blade.

12

This is one you definitely want to practice with.  It’s very easy to break through the paper - I usually do 3 or 4 very light passes.

If you don’t have any special paper crafting tools, don’t worry, you can still get great results!  Grab a butter knife and 2 magazines (or a ruler and a magazine…or a mouse pad and a magazine - something to use as a straight edge and something to pad underneath).  Use the back side of the butter knife - not the side the the little serrations. 

11

Final tip: When you’re scoring your folds, the ridge that is created on the underneath should be the inside of the fold. 

Are you ready to find a new project to practice on?  Use coupon code Scoring311 to get 25% off your purchase from my store before 4/3/11

Saturday, March 26, 2011

A Little Look Back

Hey! Sarah here, with a look back at some of the past hybrid templates that Wendy has released, and what others have done with them!

GoodFriendCard
kit: Friendship by Jacabean Designs
template: Cards Vol. 5: Cut Down


Created by Evie :) Isn't it just a beautiful card?!

hybrid1
Keep me Posted Notepad Holder Template
March's first hybrid! A great result! What a great way to get someone involved in hybrid! :)

BabyBoyCard-sfw
another card and envelope with WendyBird Designs' totally awesome Cards Vol. 1: Squares
Jumbled WordArt Pack by FlutterbyeFaery Designs
made with Summer Skies by FlutterbyeFaery Designs


Another Evie hybrid, but I can't resist this! It's so bright and pretty!!

Untitled-118
Wendy's No Cut Template & the Beary Scary Mega Kit & Add On!

Created by Terra! These bags were SO much fun to make (I've made them myself)! They work for ANY reason!! )

FramedOrnaments
Ornaments Bundle 1: Volumes 1-3

Created by Mara! I've seen these used as regular decorations, and not just Christmas!

So, what are you going to scrap next?

Friday, March 18, 2011

March Hybrid Challenge

Hi everyone! Hope you all had a great St. Patrick's Day and didn't have too much trouble from those pesky little leprechauns.

Have you seen the Hybrid Challenge Wendy has at Brownie Scraps this month? It's so fun! I finally got mine done.


My daughter wants to use them as party favor boxes for my granddaughters 1st birthday party next month, so looks like she'll be doing alot of cutting and pasting away from the computer :)

You can find the template HERE, and it's free til the end of this month! You can post an image of your finished box in Wendy's gallery. Have fun and Happy Hybrid-ing :)

Thursday, March 17, 2011

Happy St. Patty's Day Freebie!

Are you wearing green? Last night I whipped up a cute felt shamrock to wear in my hair, but of course I forgot to take a picture!

Do you need a last minute St. Patrick's Day card? Well hop on over to the Brownie Scraps blog and pick up a free template from me!


Just like my Fold Over Cards, it folds into thirds to make a 3x3 card - such a fun size! And if you've purchased the original cards, you have an envelope template sized to fit :)

Here's mine:


Check out the other great cards in the Blog Challenge gallery!

Tuesday, March 15, 2011

Picnic Basket

If you've spent $10 at the Brownie Scraps store this month, you've gotten the March Mega Collab, Park Date - so today's template will look familiar to you!


Find it in the store HERE and don't forget it's 25% off today!


Sunday, March 13, 2011

Using a Hybrid Template

Hybrid projects can seem a bit intimidating if you’ve never tried, but today I want to show you just how easy it is!  In the coming weeks I’m going to do a series of technique tutorials and challenges, but today I want to start with the very basics, using a template.  If you can use a layout template, you can use a hybrid template!  For the purposes of this tutorial, I’m going to start at square one, but still read along - you might pick up a tip or two along the way!

First of course you’ll need one of my templates!  Find them in my store at Brownie Scraps, or else check out the monthly hybrid challenge!

You will need to have a photo editing software such as Photoshop, Photoshop Elements, or Pixlr - a free program that runs online, you don’t even need to download anything!  I have only played with it a little bit, but it seems to be set up similar to Photoshop.  If you are using it and have questions, let me know - I will do my best to help! 

When you unzip, you will find the template in multiple formats: PSD - to use in Photoshop or Photoshop Elements, TIFF -  to use with PS, PSE and other programs (smaller than a PSD), individual PNG layers - to use with Pixlr and other software, and a PDF - this is the outline only that you can print on colored cardstock if you don’t want to customize it with digital kits.  Pick what format works best for you.   I also include step by step instructions for 3D templates.  If you’re not sure how a template is going to be put together, it’s a good idea to print the PDF version and do a trial run.  That way you don’t waste color ink!  And if you ever have any questions about a template or hybrid in general - before or after you purchase - please don’t hesitate to contact me!  You can email me at wendybirddesigns@gmail.com or message me at Brownie Scraps, my username is WendyBird.

I use Photoshop CS2, so that’s what you’ll see in the tutorial along with a PSD file. 
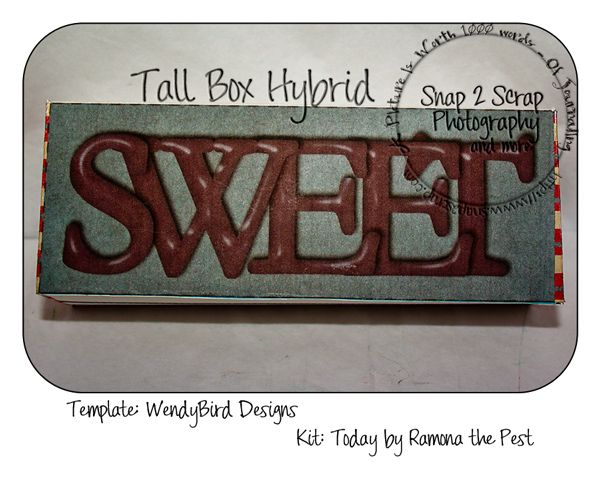
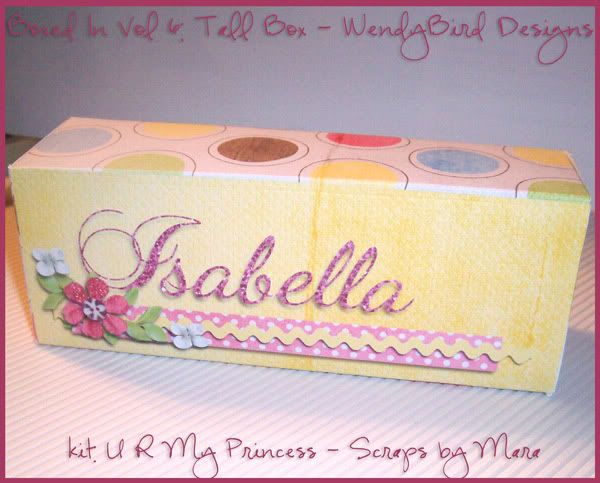
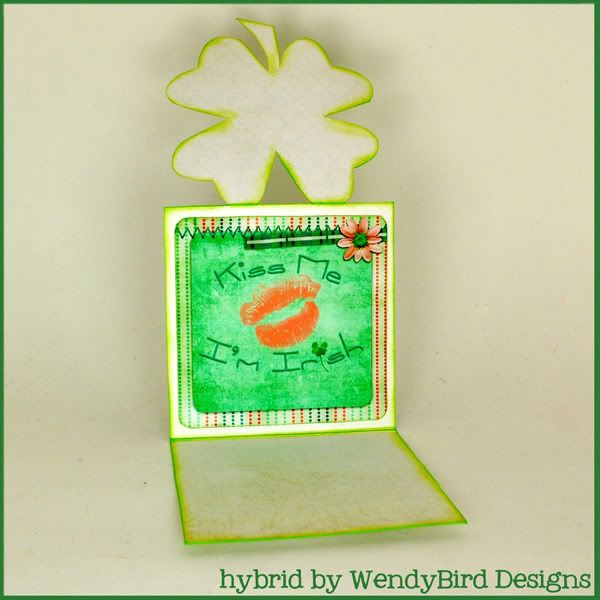
I will be using Boxed In Vol. 5: Put a Lid On It, which you can get free for the rest of this month for the March Hybrid Challenge!
wbd_lidbox_preview
Open the template either by double clicking on it on the file, or by choosing File > Open in Photoshop.  It’s always a good idea to go ahead and save the template under another name so that you don’t accidentally save over the original.

This particular template prints on two 8.5 x 11 sheets of paper.  For now, we’re just working with the box bottom.
image
You will notice that I include a layer that is the full shape, as well as layers that you may want to customize. 

There is also a layer that is your cut and score lines, but we’ll talk about that one more later.  Some templates also have a layer labeled “DELETE”.  This is simply a guideline for you to be able to see which part of the template is what and which direction will end up being up. 

Next you’ll need to choose that paper you’re going to use to decorate your template.  I’m using Giddy Up Girl by FlutterbyeFaery Designs


Bring your paper into Photoshop either by dragging it into your workspace or by choosing File > Open
Drag your paper onto your template canvas (hold shift to keep it centered). 
image

Here’s a close up of my layers at this point.  I am going to make my box bottom all the same paper, so I’ve turned off the layers that separate the bottom and sides.  You can delete them completely.
layers1

We want to use a clipping mask to “cut” the paper in the shape of the template.  Make sure that your paper is the layer above the shape you’re going to clip it to.  There are a few ways to create your clipping mask -  you can choose from the menu Layer > Create Clipping Mask, you can do Ctrl/Command+Alt+G on your keyboard, or you can use my preferred shortcut - hold down alt and hover your mouse between the two layers until it turns into two intertwined circles, then click your mouse.  

2

Resize your paper and move it until you are satisfied with how the pattern falls. 

Now for your Lines layer.  If you leave them black, they will really stand out on your finished project and you should have your great handiwork noticed - not the lines!  Here’s an example where I forgot to make any adjustments.  It really detracts from the cuteness!


To make the lines just dark enough to see for assembly we want to change our blending mode of the lines layer.  The easiest way to do this is to change it to Soft Light.  This will change the lines to the color of the paper under them.  
3

If your paper is very light or very dark, they may disappear completely.  If this happens, change your blend mode back to normal but lower the opacity to about 20%.  As a rule, I got about 5% lighter than I think I need to - they will still print enough for you to see when it’s flat but they will blend in once they’re folded.
After you’ve done this, you can flatten your layers and print!  Check out my post the forum here for printing tips

If the template goes together in a way that the back of the page will be seen, I like to print on the back side of my paper too.  In this example, the back of the page becomes the inside of the box.  I generally don’t like to see any plain white cardstock on my projects.  It is pretty impossible to get the front and back of your paper lined up exactly, so I will print a full page.  The little bit of extra ink it takes is worth it to me to get rid of that offensive white! haha

From there, just follow the instructions to put together your project and enjoy!

In the coming weeks, I’ll take you through some basic assembly tutorials and some advanced techniques!  If there is anything you’d like to learn how to do, just leave a comment or drop me a line!

Thursday, March 10, 2011

Hybrid Happiness!

Hi y'all! Tanyia here. I wanted to share with you some of the happiness of the hybrid world that I have found since beginning this hybrid adventure! Wendy has some amazing templates but you can also do hybrid projects with out templates, and use the templates in your stash to even inspire things you would never have considered before! Take a look at some of the hybrid happiness I have found in digi land. Each picture is linked so that you can see all the proper credits and see that I let the people know they are having their brilliance displayed for the whole blogosphere to share!

First, here is one from me. This is done using a Martha Stewart Hydrangea punch and a styrofoam ball:


This is a gorgeous candle holder, wrapped with a beautiful array of patterns and a pretty flower:


Beautiful flowers shaped out of digital papers:


Pretty little cupcake toppers!


Ok, ok, I could seriously stay here and share goodies with you all day! For now, get out there, scour the galleries and get inspired. Become part of the hybrid family. If you have any questions you can always comment and I am sure someone on our team will be more than willing to help out!

Also come join us at Brownie Scraps, Wendy's Design home. She hosts a hybrid challenge, there is lots of good templates in the store, more inspiration in the gallery, and of course our whole team!


Until next time, have a scrap happy day!


Tuesday, March 1, 2011

Splendidly Spring Freebie

Sigh.  So last night I wrote up my whole post with my new release, pictures, the freebie, the whole she-bang and scheduled it to post for this morning.  Well apparently I only saved it as a draft, didn’t publish it.  I use Live Writer (love it!), so it’s saved on my laptop at home and now I’m at work so I can’t access my draft.

I’m going to wait and do the new release post later because we are switching our store software over to XCart (yay!) and I didn’t load it into the old one.  

You will have to re-register, but just for the store.  XCart has lots of great features, including a wish list!   Once you get all signed up again,  make sure you fill up your wish list, because at the end of the month, we’re going to draw 3 winners to win items on their wish list!  See full details HERE in the forum.

So for now, let me give you the freebie!

I used Splendidly Spring, a fun collab by Ramona the Pest and Marni Designs – isn’t it cute?  It will be in the new store too!

rtp_md_ss_preview

I created a printable card for you – just print, cut it out, fold in half and send to someone who needs a smile!

wbd_rtp_md_splendidlyspring-cardprev

Note: I know that not everyone is on the Facebook/Twitter train.  But, for now at least, I’m going to stick with the pay with post set up.  It’s still free for you to get the download and it helps me to get my name out there and spread the word that there’s a freebie available.  You can always set up a twitter account just for these types of freebies… it’s free and you don’t have to get any email notifications or anything, so it would be invisible to you :)