I don’t know about you, but I always get a late start getting organized for the new year. I guess I’m so worried about getting through Christmas that I don’t think past Dec 25! So come the first of the year, I am always looking for a fun new planner.
I hadn’t decided what I was going to do this year until Crystal (krystlbear) posted at Brownie Scraps about a planner she found at Wal-Mart. She found this one for $2. My Wal-Mart didn’t have those ones, but I did find this one for $2.97. It doesn’t matter what the picture on the cover is, because of course we’re going to make it cute! I found some in the dollar bins at Michaels too, but they all had pictures of kitties and puppies on the inside too.
I altered away and here’s what I ended up with!

I used Ramona the Pest’s gorgeous new kit, Today. It’s perfect for calendars and 365 projects!

As a special thank you and welcome to 2011, I created a set of templates to fit each calendar and I’m giving them to you for free! I am also giving away this completed planner! See the bottom of this post for details.

Download from Box.net - 3 1/2” x 6 1/2” Fits DaySpring 28 month planner

Download from Box.net - 3 5/8” x 6 1/4” Fits Mead 2 year planner
Each template set comes with 2 designed templates and a plain one so that your creativity can run free!
The templates are slightly oversized to compensate for printer shrinkage. There is a bleed layer in the template showing approximately what may be cut off when you trim it to size. Do not put anything important in this space and delete this layer before you print.
Here’s how I assembled it: Download PDF instructions (not included with templates)
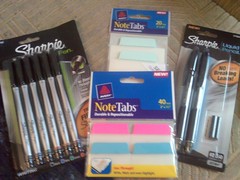
1. Supplies: Printed Cover, pocket calendar, scissors and/or craft knife, scoring tool, double stick tape or other adhesive, ink (optional), ribbon, fray check (optional).

2. Cut on the solid lines. Score on dashed line.

3. Apply adhesive to the front of the calendar only. Adhere the front of the cover, lining up the edge carefully. Fold over and repeat on the back.

4. Trim off any excess and ink the edges of all pieces if desired.

5. Position the ribbon, leaving plenty of tail to tie. Use adhesive to attach to the front cover.

6. Adhere any extra layers over the ribbon.

7. Lay the calendar over the plastic case and use a craft knife to cut small notches on either side of the ribbon.

8. Cut away the sealed edge to allow the ribbon to be threaded through.

9. Repeat in the center fold.

10. Insert the front cover into the plastic case, threading the ribbon through to slot. Thread a loop through the center slot to hold the pen.

11. Repeat with the back cover, (carefully - it will be tight). Trim up your ribbon ends if necessary and apply fray check if desired.


If you’d like to win it, just leave a comment here! Make sure to include your email address so I can contact you if you win. I will announce the winner on Friday January 14th!
I would love to what you create, link it up in my Brownie Scraps gallery!